Starting with WinZip 22.5 and Courier 9.0 (see Email Sharing with WinZip Courier), you can select and schedule files to be deleted after a certain number of days. The default is 30 days, but can be set to a higher or lower number if you prefer.
Schedule existing files to be deleted
All WinZip licenses; Standard, Pro, or Enterprise; can schedule files and/or folders to be deleted from attached local drives and network drives. With a WinZip Pro or WinZip Enterprise license, you can also schedule existing files and/or folders to be deleted from your configured cloud services.
To schedule existing files to be deleted:
- Locate and right click one file or one folder in the Files pane (Schedule for Deletion is not available with multiple items at this time).
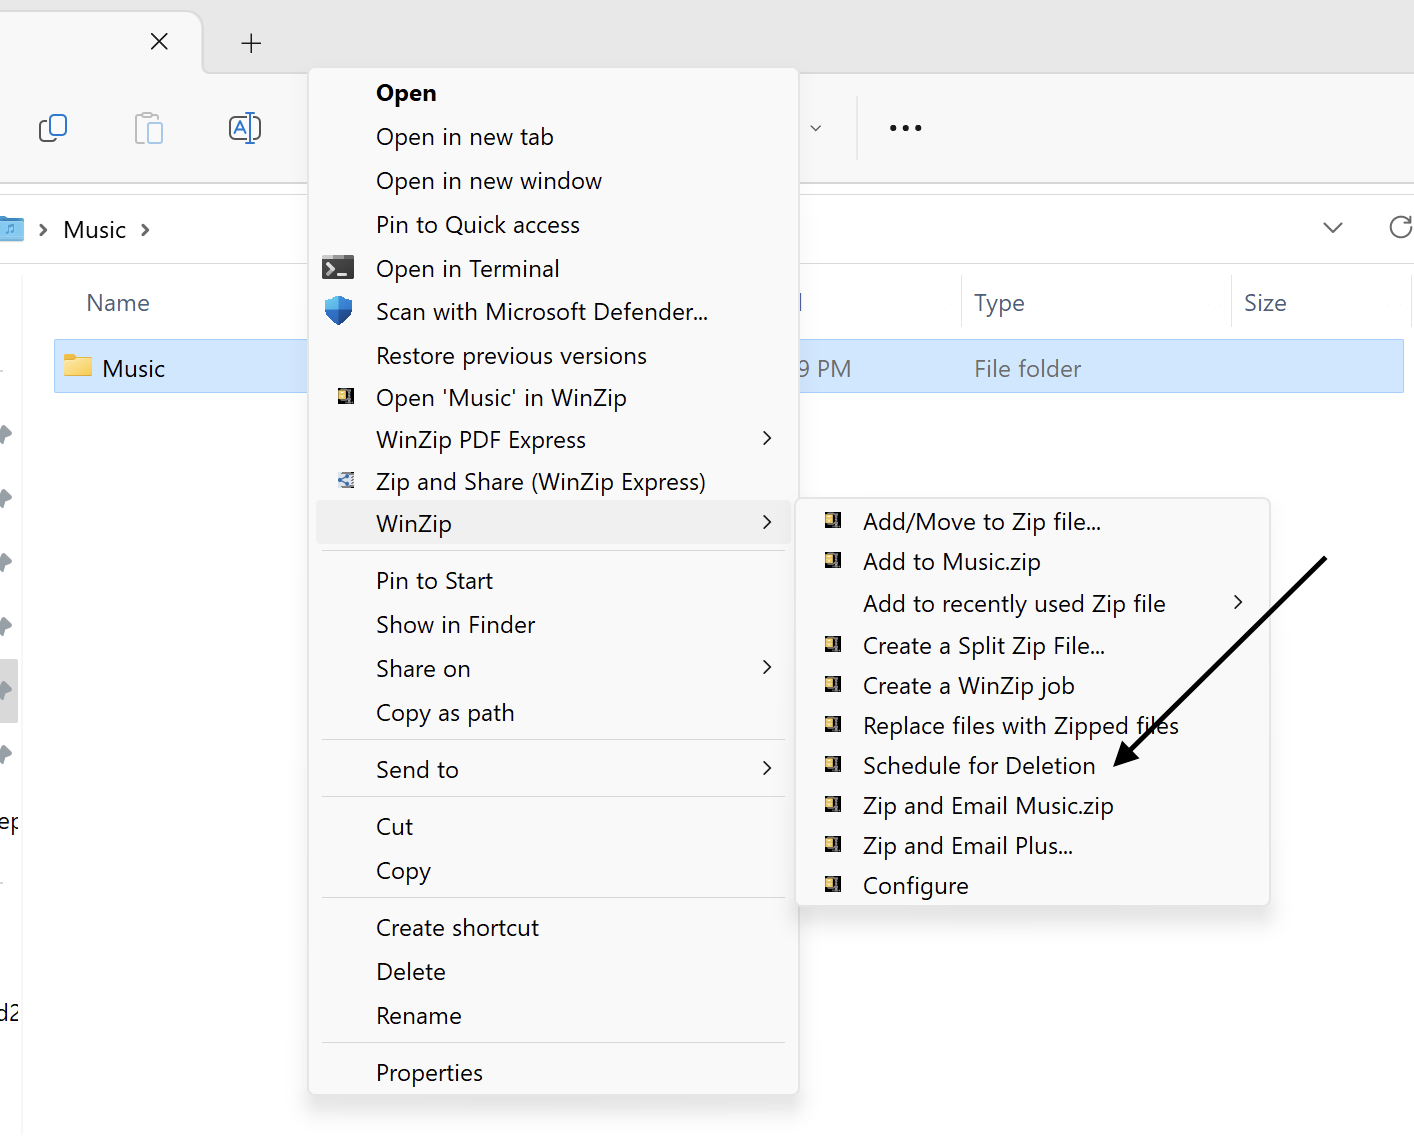
- In the context menu that displays, click Add to the Deletion Schedule.
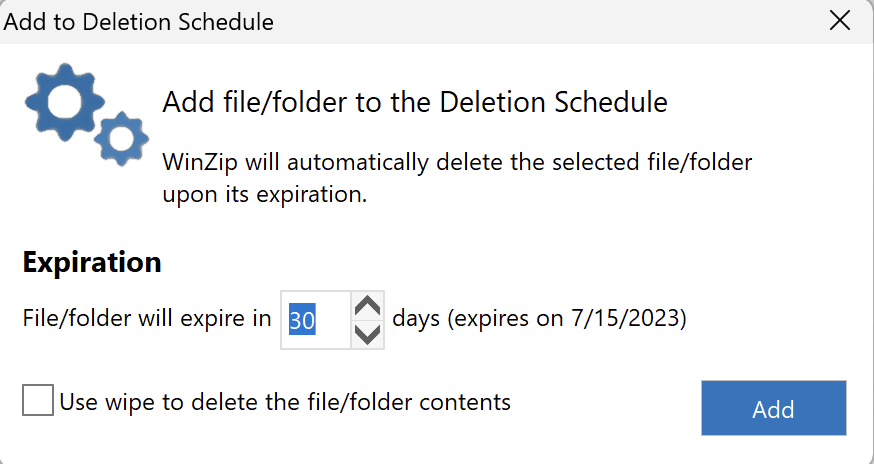
- The Add to Deletion Schedule dialog now displays; you can do either or both of the following:
- Change the number of days until deletion for this selection
- Choose to not only delete files, but securely wipe them
- After making your selections, click Add; your file will now be deleted after the number of days you configured.
Schedule to delete using WinZip Express
You can schedule Zip files to be deleted right as you create them if you are using one of the WinZip Express features. Those features are Zip and Share, Snap and Share, and Scan and Share.
- WinZip users having any license will find the Schedule for Deletion check box to be active if the Save Zip file to box has been filled in or checked.
- The configuration arrow to the right of Expire Zip file check box opens the Optional File Expiration dialog. This one is the same as the Add to Deletion Schedule dialog, but lets you know it is optional to schedule files from WinZip Express
- Users having a WinZip Pro or WinZip Express license will also be able to use Schedule for Deletion when any of the share as a link options have been selected. To share a file as a link, it must first be uploaded to a cloud service.
Automatically schedule shared files to be deleted
| Note: this feature requires WinZip Pro or WinZip Enterprise. |
WinZip makes it possible for you to automatically delete the files you share, which can help you to prevent exceeding cloud service limits. To make use of this feature, you first need to click the Expire Files button to turn it on. You will find the button in the Sharing section of File tab.
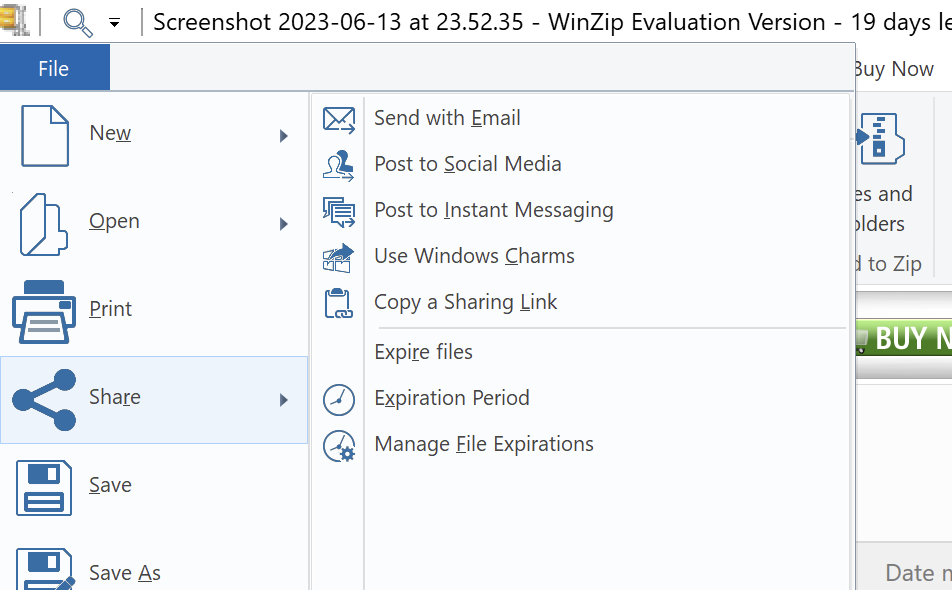
The picture above shows the button as it appears when this feature is turned on. After you click Expire Files, the Optional File Expiration dialog, pictured in the previous section above, will display. This allows you to set the number of days you prefer before your shared files will be deleted. The default is 30 days and can be reset at any time using the drop-down menu that is part of the Expire Files button.
Once you have turned Expire Files on, any WinZip share action that results in your file being uploaded to a cloud service will allow to add the file to the Deletion Schedule. Files that you directly share by email (attach to an email message) will not be scheduled for deletion.
The Deletion Schedule
When you manually schedule a file for deletion or when a file is scheduled automatically, it will be placed on the Manage File Expirations. WinZip creates 2 Scheduled Tasks when it is installed that will read the deletion schedule and take the action you have indicated. One task runs just before midnight if your computer is running then, and the other runs when you login. In this way, the files you have configured to be deleted will have that done in a timely manner.
If you want to check the Deletion Schedule and possibly change a file's deletion date or cancel a deletion, you will need to click the Manage File Expirations on the Sharing Settings in WinZip.
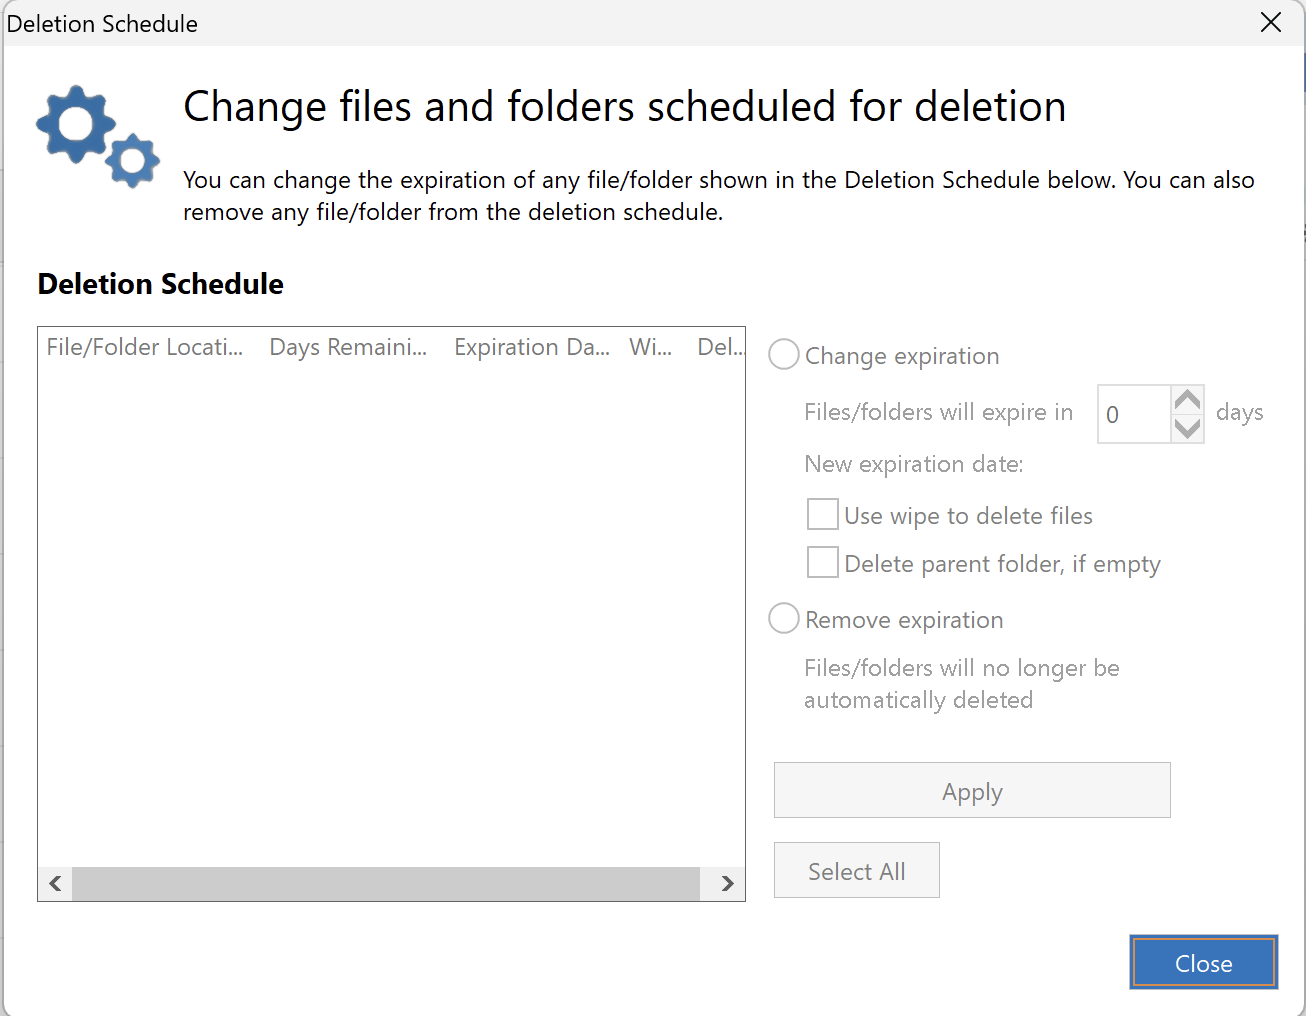
When the Deletion Schedule opens, you may want to move your cursor into a spot that would be where a column starts or ends and then click and drag to the right or left to make a column wider or less wide.
This will be particularly useful to make the file names show.
You can then select a file and:
- Change the number of days before the file is deleted
- Toggle the Wipe feature on or off for local or network files being scheduled
- Remove the expiration so that the file will not be deleted
- Click Apply to record the change you chose to make
Was this article helpful?
Tell us how we can improve it.